Getting started
Stringer is distributed as a zip archive containing the following files:
- Command-line interface:
stringer.jar(executable JAR file) - Graphical interface:
stringer-gui.jar(executable JAR file) - Application for macOS:
Stringer-GUI.app - Annotations JAR:
stringer-annotations.jar - Gradle Plugin:
stringer-gradle.jar - Maven Plugin:
stringer-maven-plugin.jar - Reference configuration file and build scripts:
stringer.xml,samples/ - License texts:
NOTICE, LICENSE
1. Download
The download link will be sent with an activation code via email after requesting a trial license, or after purchasing a full license(s).
2. Activate
To get a fully functional activation code, purchase the required number of licenses. In this case, registration is obligatory. You can register by entering your email address when purchasing the license. Further instructions how to set your password and installation directions will be sent to the email address you provided during the checkout process.
When purchasing the product via FastSpring the activation codes are sent within 24 hours after the funds are received. If a contract is signed with a company, the activation codes are sent after receipt on account or after a copy of a payment order is submitted.
The license information will be displayed on your profile. The license status will be displayed as: Generated – meaning that the license code is generated but not used or Activated - meaning the activation code is used. Your login is your email you used when ordering Stringer Java Obfuscator.
The activation code is single-use. It means you have to contact the customer support to get a new code if the original license file was lost.
Stringer Java Obfuscator supports two activation methods: online and offline. If you have an active Internet connection you may use online activation. If you have not Internet connection, or if it is limited by various traffic filter systems you should use offline activation. In this case, it is necessary to generate activation request code using CLI or GUI, and send it to primary@licelus.com via email. You can do it from another computer or a device which has an active Internet connection.
Activate via CLI (online)
To activate Stringer Java Obfuscator online in the console mode, run the following command:
java -jar stringer.jar -activateand follow the instructions.
After successful activation the license file stringer.licel will be created in the user's home folder.
To use a license file located in a different folder and not in the same folder with stringer.jar, it is necessary to specify the path to the license file.
Activate via CLI (offline)
In order to activate license offline run the following command:
java -jar stringer.jar -activationRequestAfter you enter an activation code a request code will be generated. You should email this code to primary@licelus.com. In 24 hours you will receive response code, then run the following command:
java -jar stringer.jar -activationResponseEnter the code you have received. After successful activation the license file stringer.licel will be created in the user's home folder.
Activate via GUI (online)
To activate the license online via the GUI, double-click on stringer-gui.jar (Windows/Linux) or Stringer-GUI.app (MacOS).
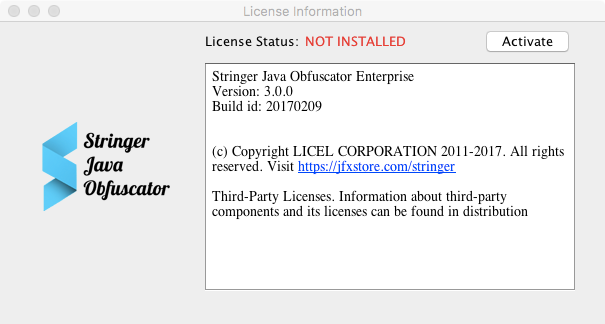
Click the License Info in the application window.

Then click Activate, enter the activation code and click Activate online.

After successful activation file stringer.licel will be created in the user's home folder.
Activate via GUI (offline)
To activate the license offline via the GUI, double-click on stringer-gui.jar (Windows/Linux) or Stringer-GUI.app (MacOS).
Click the License Info in the application window.

Click the Activate, enter the activation code and click Generate activation request.

You should email this code to primary@licelus.com. In 24 hours you will receive a reply with an activation response. It is necessary to enter the code in a field which will appear after clicking Enter activation response.
In case if you turned Stringer Java Obfuscator off, run it again and follow License Info -> Activate -> Enter activation response.

3. After Activation
After successful activation, the license file stringer.licel will be created in the user's home folder.
-
Overview
Introduction to Stringer > Overview -
Features
Introduction to Stringer > Features -
Samples
Introduction to Stringer > Samples -
Introduction
Getting started > Introduction -
1. Download
Getting started > 1. Download -
2. Activate
Getting started > 2. Activate -
3. After Activation
Getting started > 3. After Activation -
Configuration file format
Configuring Stringer protection > Configuration file format -
Filters: A guide to targeting code and resources
Configuring Stringer protection > Filters: A guide to targeting code and resources -
Annotations
Configuring Stringer protection > Annotations -
Run Stringer via the CLI
Implementing Stringer protection > Run Stringer via the CLI -
Run Stringer via the Stringer GUI
Implementing Stringer protection > Run Stringer via the Stringer GUI -
Eclipse Plugin
Implementing Stringer protection > Eclipse Plugin -
Ant Task
Implementing Stringer protection > Ant Task -
Maven Plugin
Implementing Stringer protection > Maven Plugin -
Gradle Plugin
Implementing Stringer protection > Gradle Plugin -
NetBeans
Implementing Stringer protection > NetBeans -
JavaFX Projects
Implementing Stringer protection > JavaFX Projects
Link copied!